Selecting a memory card to use with your camera is an important decision that should take the following things into account: Cost, speed, and reliability. Reliability is hard for an individual to measure outside of anecdotes (I’ve never had a card fail), but cost and speed are easy to observe.
B&H had a sale on Kingston Canvas React Plus SD cards during their recent Mega Deal Zone event. I decided to check them out. The specs were good and the prices were good. But was it truly a good deal? I ran tests on every model of SD card I own to see where they all stand, and I’m sharing the results with you.
First, some background about the cards in the test. I’m a thrifty person. I don’t buy the fastest and most-expensive cards, but I don’t buy the cheapest cards either. I buy the card that is good enough to do the job and presents the best value. I also see no reason to buy cards faster than what your camera can make use of. For example, I didn’t buy UHS-II SD cards until I actually owned a camera with a UHS-II slot. You won’t necessarily see the market’s fastest cards in this review. You will see cards that are or were commonly for sale at popular electronics retailers.

In total, I tested 18 cards from SanDisk, Sony, Kingston, Lexar, and ProGrade. Since ProGrade products launched in 2018, their cards have been my preference. But that doesn’t mean I’m not on the lookout for cards that may present a better value in terms of speed and cost.
Methodology
I own multiple copies of most of the 18 cards tested. I randomly selected the individual cards to be tested from my stash of cards.
They were tested on a home-built desktop computer with an Intel Z370 chipset and Windows 10 Pro 22H2. The memory card reader was a SanDisk ImageMate PRO SDDR-A631 connected via USB3 to a port on the motherboard.
Each card was formatted on the computer before each speed test. The exFAT file system and Quick Format option were used.
CrystalDiskMark 8.0.4 x64 was used to measure the read and write speeds. I used the Default test mode in CrystalDiskMark and selected a 32MB test size because that is close to size of the RAW files produced by the Canon EOS 5D Mark IV and Canon EOS R. However, the newer Canon mirrorless bodies are able to take advantage of the C-RAW format, which produces files of only around 11MB with the EOS R6. My goal was to see how these cards handle individual photos, not 1GB files (the default test size). This help page for a cloud computing company says to set the test size to one that mimics a “realistic working set size” that “simulates the real life behaviour.” It looks like I’m justified in using a 32MB test size. I should note I am primarily a stills photographer, so video performance (larger files) is not a primary concern for me. I left the test count setting at 5, as that seemed sufficient. The test data was set to be random.
I ran each test 3 times per card. So I would format a card, run the speed test, format the card again, speed test again, format again, and run a third speed test. If you recall, I had CrystalDiskMark set to do 5 tests per run, so there were technically 15 tests done per card.

The test returned a lot of info. Sequential read of 1MB of data, 8 queues, 1 thread. Sequential writes of the same. Sequential read of 1MB of data, 1 queue, 1 thread, and the same for sequential writes. And figures for randomly-accessed data. I’m not an expert on data throughput, so let me know if I make incorrect assumptions here. I decided to focus on the “SEQ1M Q1 T1” results. From what I understand, the higher queue count mimics a drive being hit with multiple requests at once. I don’t think cameras work like this. A photo is taken, it goes to a buffer on the camera, and then goes to the memory card. I don’t think the camera is writing 8 photos to a card at once. I think they’re being released one at a time from the buffer to the card, as fast as the card can write them. A slow card means photos won’t go from the buffer to the card fast enough, meaning the buffer will fill and the camera will stop shooting frames. As I said, let me know if I’m wrong. Regardless, I think all the numbers I was able to pull from CrystalDiskMark allow for a fair comparison between cards because I performed all the tests the same way. If I was wrong with my testing and interpretation, at least I was consistently wrong.
I should note a few cards had test runs that returned noticeably faster or slower speeds. In those cases, I ran an additional test and set aside the outlying result.
The data from the 3 test runs per card were entered into a spreadsheet. I averaged the read and write speeds of these 3 tests to come up with the values I would analyze and report here.
The Results
For me, the write speed of a memory card is more important than the read speed. Read speeds are usually higher than write speeds, so that’s the big sexy number the card manufacturers like to promote. 300MB/s! 1667x! High read speeds are nice – that means you’ll be able to copy the photos to your computer faster. But when you’re at your home/office/studio, you’re probably not pressed for time. You can get a beverage or hit the bathroom while the photos copy to your computer. But when you’re capturing images, time is of the essence. You need to capture emotion, an athletic achievement, a life event. There are no second chances. You’re mashing the shutter button hoping to catch that millisecond when a runner crosses a finish line, when a bird grasps a fish with its talons, or a fleeting facial expression. A card that writes quickly gives you a better chance of catching these moments because you’re able to capture more frames and you can select the frame that best conveys the moment.
I’ll list the Top-5 results, then make some conclusions.
| Card Model | Write Speed |
| Kingston 64GB Canvas React Plus 300MB/s | 219.93MB/s |
| ProGrade 64GB 250MB/s | 143.01MB/s |
| ProGrade 128GB 250MB/s | 140.52MB/s |
| Sony 64GB SF-M Tough 277MB/s | 116.38MB/s |
| Sony 64GB SF-M 277MB/s | 106.58MB/s |
| Card Model | Read Speed |
| Sony 64GB SF-M Tough 277MB/s | 258.31MB/s |
| Sony 64GB SF-M 277MB/s | 250.12MB/s |
| ProGrade 64GB 250MB/s | 247.79MB/s |
| ProGrade 128GB 250MB/s | 245.45MB/s |
| Lexar Professional 64GB 1667x | 243.59MB/s |
As stated earlier, it is my opinion that write speed is more important than read speed when it comes to camera memory cards. Unsurprisingly, all but one UHS-II card (the Kingston 32GB Canvas React Plus 300 MB/s) wrote faster than the UHS-I cards in my test. Only two cards failed to meet their specified minimum write speed, the Kingston 32GB Canvas React Plus 300MB/s and the Lexar Professional 64GB 633x. I was able to find the maximum write speed for only 12 of the 18 cards in the test, which is to be expected since some of the cards are pretty old. There were four cards that exceeded their advertised maximum write speed: the ProGrade 64GB 250MB/s, ProGrade 128GB 250MB/s, SanDisk Extreme Pro 64GB 170MB/s, and SanDisk Extreme Pro 128GB 170MB/s.
Now for the read speeds. These are the sky-high numbers the manufacturers like to advertise and emblazon on their cards. Remember they are maximum read speeds. This is the fastest you can read from the card, and it’s almost certain your reads will be slower. Only four cards were faster than their advertised maximum read speed. They were the SanDisk Extreme Plus 32GB 80MB/s, SanDisk Extreme 32GB 60MB/s, SanDisk Extreme 32GB 45MB/s, and the SanDisk Ultra 32GB 30MB/s. These are older cards and perhaps their performance was underestimated by SanDisk. I should mention the SanDisk cards I tested that did not exceed their advertised maximum read speed fell short by less than 1.3MB/s, so the read speeds they advertise are pretty much what you will get.
It was impressive how close the SanDisk cards were to their maximum read speeds. However, there is one caveat. The SanDisk Extreme Pro UHS-I cards that claim read speeds higher than the UHS-I maximum of 104MB/s use a technology that only works with certain card readers to reach those higher speeds. I did test the SanDisk Extreme Pro 128GB 170MB/s with a Lexar LRW300U (Rev E) card reader and it only achieved a 93.53MB/s read speed. Therefore, it should be assumed these SanDisk Extreme Pro UHS-I cards will exhibit more-modest read speeds in your camera. But read speeds in a camera really only matter when you’re playing back photos or videos, which isn’t very throughput-intensive.
Upon examining the test results, the Kingston Canvas React Plus cards confused me. The 64GB card’s write speeds were 1.5x faster than the next fastest card. As explained in my methodology, these results come after 15 tests (three sets of five tests). I actually ran an extra set of test runs on that card because of the read speed in one set looking abnormal. It posted a 200MB/s+ write speed in all four test sets. So those speedy writes mean the Kingston Canvas React Plus 64GB is the best card, right? Not exactly. That card’s read speeds were middling, ranking 9th and last among the UHS-II cards at 162.74MB/s and nowhere close to the advertised 300MB/s max. This discrepancy keeps me from wholeheartedly recommending it.
You may have noticed I said Kingston Canvas React Plus cards in the previous paragraph. The 32GB card was even more enigmatic than its big brother. Its 217.19MB/s read speed ranked 6th overall, but its write speed was a poor 47.17MB/s, ranking 14th. Why is the 32GB card so much slower to write than the 64GB card? The Kingston 32GB UHS-II card actually wrote slower than all the SanDisk Extreme Pro UHS-I cards. I did change the test parameters, going back to a 1GB test size, and the card performed closer to its advertised speeds. However, what camera produces images 1GB in size? Also, none of the other cards, including the Kingston 64GB, were as far off their advertised write speeds when I used the 32MB test size. For this reason, I stand by the 32MB test size results.

I should also note that the Kingston cards were unused prior to testing. The only reads and writes to these cards have been done at the factory and during my tests in CrystalDiskMark. All the other cards in the test have been used multiple times in my cameras and may be several years old.
Recommendation
In order to come up with recommendations based on my test results, I ranked the cards by read and write speed and calculated their average. This would balance out the fast and slow speeds of the Kingston cards and hopefully show us which cards are the best all-around performers. As shown earlier, the ProGrade and Sony cards took the top four spots among the average read and write rankings. There were ties for the 1st and runner-up positions. I settled the ties by going with the card that wrote fastest.
| Card Model | Average Rank |
| ProGrade 64GB 250MB/s | 2.5 |
| Sony 64GB SF-M Tough 277MB/s | 2.5 |
| ProGrade 128GB 250MB/s | 3.5 |
| Sony 64GB SF-M 277MB/s | 3.5 |
| Kingston 64GB Canvas React Plus 300MB/s | 5 |

I recommend purchasing ProGrade 250MB/s SD cards. While the ProGrade cards were beat by the Kingston 64GB card for write speed, I feel the ProGrade cards write fast enough and they are 30MB/s faster than the Sony cards. When it comes to read speed, they’re negligibly slower than the Sony cards and come closer to their advertised read speeds than the Sony cards. The ProGrade cards also have much faster read speeds in my test than the Kingston 64GB card. I have many ProGrade cards, some dating back to 2018, and I have experienced no problems with them.
The two Sony cards were the subject of a recall. The recall process was more difficult than I felt was necessary. You had to call Sony, which had limited availability of representatives due to the pandemic. They wouldn’t help me through online chat. This recall really should’ve been done through website forms or email. I ended up not bothering with the process. I haven’t bought anymore Sony memory cards because none of the other cards I have owned during the past 19 years have been subject to a recall. I feel I can’t trust Sony cards, and if there is a problem, the customer service may be lacking. While I can’t guarantee ProGrade or SanDisk will be any better, I’ve never needed their customer service.
ProGrade does offer faster 300MB/s read 250MB/s write cards. The ones I tested claimed 250MB/s read and 130MB/s writes. I feel these “slower” cards are still plenty fast for my needs. I photograph motorsports and cross country running, as well as doing some planespotting, and I haven’t had an issue with my cards being too slow to handle laying on the shutter button for a few seconds. However, I do shoot with 20-30MP bodies, so you may want to step up to the faster card if you have a higher-megapixel body.
Another reason I lean toward ProGrade cards is cost. Notice there were no SanDisk UHS-II cards in my test. For some reason, SanDisk’s UHS-II cards are expensive. Looking at B&H, a SanDisk Extreme Pro 32GB 300MB/s card goes for $59.99 while a ProGrade 128GB 250MB/s card goes for $54.99. While the SanDisk boasts faster maximum read and write speeds, you’re getting only a quarter of the storage space for your money. The prices do become closer when you compare equivalent cards. The ProGrade 64GB 300MB/s goes for $79.99 and the SanDisk Extreme Pro 64GB 300MB/s goes for $109.99, but they can be priced identically during sales.

There is a similar situation with the Kingston 64GB 300MB/s card and ProGrade 128GB 250MB/s card. The Kingston card costs a few dollars less than the ProGrade card and may give you much faster writes (220MB/s vs 141MB/s), but it has half the capacity and much slower reads (163MB/s vs 245MB/s). You’ll have to look at how you shoot and weigh these pros and cons. Which card has the right mix of speed, capacity, and cost for you?

Here’s another way to look at it: Two fast cards or one really fast card?

I’d like to test a SanDisk UHS-II card someday, but the cost will have to come down. It would be nice if SanDisk came out with a slightly slower and commensurately cheaper UHS-II card. For me, the ProGrade 250MB/s cards are fast enough and the faster SanDisk and ProGrade cards aren’t worth the extra cost. For example, the 128GB ProGrade 250MB/s card sells for $54.99 while their 300MB/s card sells for $144.99. It’s hard for me to justify an extra $90 for 300MB/s read and 250MB/s write versus 250MB/s read and 130MB/s write. Your needs may differ from mine, and the faster cards may be right for you if you shoot with a high-megapixel body or shoot 4K video.
I am reasonably certain a SanDisk UHS-II card will perform as advertised. This was observed in my testing of their UHS-I cards and I would expect their UHS-II cards to perform close to their advertised maximum read/write speeds. I don’t think you will go wrong if you decide to purchase a SanDisk Extreme Pro UHS-II card instead of a ProGrade card.
Newer Lexar cards were omitted because of the change in ownership of the brand. Longsys purchased Lexar from Micron in 2017. Micron is a top-notch memory company. Micron stuff is trustworthy and I used Lexar CF cards for a long time. When Lexar got a new owner, I no longer had confidence the Lexar brand would be going on quality products.
One more thing. Avoid SD Express cards. They may tout really high speeds, but nothing can take advantage of them. No cameras use SD Express. Save your money, and read this article.
If you want to see more reviews and tests of SD cards and card readers, visit the Camera Memory Speed website. They are more experienced and thorough than I am with memory card testing, though I did test some cards they have not.
Individual Test Results
Here are the results for all 18 cards in my test. Some cards are pretty old, dating back to the mid-2000s. I included them to show how far SD card technology has come. Commentary and photos of each card follow the table below.
| Card | UHS | Read | Read Rank | Write | Write Rank | Avg Rank |
| ProGrade 64GB 250MB/s | UHS-II | 247.79 | 3 | 143.01 | 2 | 2.5 |
| Sony 64GB SF-M Tough 277MB/s | UHS-II | 258.31 | 1 | 116.38 | 4 | 2.5 |
| ProGrade 128GB 250MB/s | UHS-II | 245.45 | 4 | 140.52 | 3 | 3.5 |
| Sony 64GB SF-M 277MB/s | UHS-II | 250.12 | 2 | 106.58 | 5 | 3.5 |
| Kingston 64GB Canvas React Plus 300MB/s | UHS-II | 162.74 | 9 | 219.93 | 1 | 5 |
| Lexar Professional 1667x 64GB | UHS-II | 243.59 | 5 | 104.42 | 6 | 5.5 |
| SanDisk Extreme Pro 64GB 170MB/s | UHS-I | 169.07 | 7 | 97.08 | 7 | 7 |
| SanDisk Extreme Pro 128GB 170MB/s | UHS-I | 168.65 | 8 | 96.59 | 8 | 8 |
| SanDisk Extreme Pro 128GB 95MB/s | UHS-I | 94.40 | 11 | 84.77 | 9 | 10 |
| Kingston 32GB Canvas React Plus 300MB/s | UHS-II | 217.19 | 6 | 47.17 | 14 | 10 |
| SanDisk Extreme Plus 32GB 80MB/s | UHS-I | 94.61 | 10 | 64.95 | 12 | 11 |
| SanDisk Extreme Pro 64GB 95MB/s | UHS-I | 94.00 | 13 | 84.54 | 10 | 11.5 |
| SanDisk Extreme Pro 32GB 95MB/s | UHS-I | 94.02 | 12 | 84.21 | 11 | 11.5 |
| SanDisk Extreme 32GB 60MB/s | UHS-I | 71.26 | 15 | 52.48 | 13 | 14 |
| Lexar Professional 633x 64GB | UHS-I | 87.82 | 14 | 23.31 | 16 | 15 |
| SanDisk Extreme 32GB 45MB/s | UHS-I | 46.45 | 16 | 42.72 | 15 | 15.5 |
| SanDisk Ultra 32GB 30MB/s | UHS-I | 45.18 | 17 | 16.48 | 17 | 17 |
| SanDisk 512MB | 8.60 | 18 | 5.87 | 18 | 18 |

- ProGrade 64GB 250MB/s
- Write: 143.01MB/s
- Read: 247.79MB/s
- Place of Manufacture: Taiwan
- Discontinued. ProGrade still makes a 64GB card, but it is of the 300MB/s read class. The smallest 250MB/s ProGrade card is now 128GB.

- Sony 64GB SF-M Tough 277MB/s
- Write: 116.38MB/s
- Read: 258.31MB/s
- Place of Manufacture: Taiwan
- Fastest-reading card in the test. My copy of this card was recalled by Sony. A difficult recall process resulted in me not getting the card replaced.

- ProGrade 128GB 250MB/s
- Write: 140.52MB/s
- Read: 245.45MB/s
- Place of Manufacture: Taiwan
- Now the smallest size of 250MB/s card sold by ProGrade.

- Sony 64GB SF-M 277MB/s
- Write: 106.58MB/s
- Read: 250.12MB/s
- Place of Manufacture: Taiwan
- My copy of this card was recalled by Sony. A difficult recall process resulted in me not getting the card replaced.

- Kingston 64GB Canvas React Plus 300MB/s
- Write: 219.93MB/s
- Read: 162.74MB/s
- Place of Manufacture: Taiwan
- The fastest-writing card in the test, but its read speed is nowhere near the advertised 300MB/s maximum, ranking 9th out of 18 cards tested.

- Lexar Professional 1667x 64GB (250MB/s)
- Write: 104.42MB/s
- Read: 243.59MB/s
- Place of Manufacture: Korea
- Its read speed is pretty good, but the write speed is not that impressive. This card is probably the bare minimum I would accept if your camera is UHS-II capable.

- SanDisk Extreme Pro 64GB 170MB/s
- Write: 97.08MB/s
- Read: 169.07MB/s
- Place of Manufacture: Malaysia
- If your camera is not UHS-II capable, I would go with SanDisk’s Extreme Pro UHS-I line. The current 64GB model claims 200MB/s read speed and 90MB/s write. At the time of writing, the 64GB card sells for only $19.

- SanDisk Extreme Pro 128GB 170MB/s
- Write: 96.59MB/s
- Read: 168.65MB/s
- Place of Manufacture: Malaysia
- If your camera is not UHS-II capable, I would go with SanDisk’s Extreme Pro UHS-I line. The current 128GB model claims 200MB/s read speed and 90MB/s write. At the time of writing, the 128GB card sells for only $33.

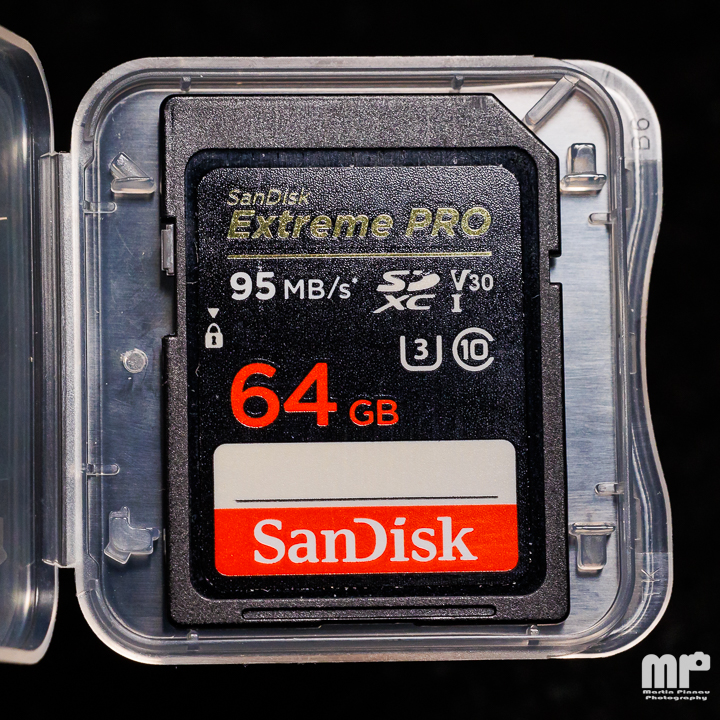
- SanDisk Extreme Pro 128GB 95MB/s
- Write: 84.77MB/s
- Read: 94.40MB/s
- Place of Manufacture: China
- If your camera is not UHS-II capable, I would go with SanDisk’s Extreme Pro UHS-I line. The current 128GB model claims 200MB/s read speed and 90MB/s write. At the time of writing, the 128GB card sells for only $33.

- Kingston 32GB Canvas React Plus 300MB/s
- Write: 47.17MB/s
- Read: 217.19MB/s
- Place of Manufacture: Taiwan
- This card is so confusing. The read speed is pretty good, but the write speed is poor, ranking 14th out of 18. Slower than several old UHS-I cards. It’s a V90 card (90MB/s minimum) with a claimed max write of 260MB/s. It performs better if I change the test parameters, but I didn’t have to do this for other cards. I do not recommend this card.

- SanDisk Extreme Plus 32GB 80MB/s
- Write: 64.95MB/s
- Read: 94.61MB/s
- Place of Manufacture: China
- At the time of its release, the Extreme Plus line slotted between Extreme and Extreme Pro in terms of performance and price. The Plus line appears to be no-longer sold.
- SanDisk Extreme Pro 64GB 95MB/s
- Write: 84.54MB/s
- Read: 94.00MB/s
- Place of Manufacture: China
- If your camera is not UHS-II capable, I would go with SanDisk’s Extreme Pro UHS-I line. The current 64GB model claims 200MB/s read speed and 90MB/s write. At the time of writing, the 64GB card sells for only $19.

- SanDisk Extreme Pro 32GB 95MB/s
- Write: 84.21MB/s
- Read: 94.02MB/s
- Place of Manufacture: China
- If your camera is not UHS-II capable, I would go with SanDisk’s Extreme Pro UHS-I line. The current 32GB model claims 100MB/s read speed and 90MB/s write. At the time of writing, the 32GB card sells for only $14.

- SanDisk Extreme 32GB 60MB/s
- Write: 52.48MB/s
- Read: 71.26MB/s
- Place of Manufacture: China
- If your camera is not UHS-II capable, I would go with SanDisk’s Extreme Pro UHS-I line. The current 32GB Extreme model claims 100MB/s read speed and 60MB/s write. At the time of writing, the 32GB Extreme card sells for $11. I’d say a bigger and faster Extreme Pro would be a better value if you’re looking at inexpensive UHS-I cards.

- Lexar Professional 633x 64GB (95MB/s)
- Write: 23.31MB/s
- Read: 87.82MB/s
- Place of Manufacture: Korea
- The write speed for this card is insufficient for recording HD video, which needs 30MB/s write speed. The U3 rating means it should hit 30MB/s, but it didn’t in 3 out of 4 test runs (I ran an extra). If your camera is not UHS-II capable, I would go with SanDisk’s Extreme Pro UHS-I line. The current 64GB model claims 200MB/s read speed and 90MB/s write. At the time of writing, the 64GB card sells for only $19.

- SanDisk Extreme 32GB 45MB/s
- Write: 42.72MB/s
- Read: 46.45MB/s
- Place of Manufacture: China
- If your camera is not UHS-II capable, I would go with SanDisk’s Extreme Pro UHS-I line. The current 32GB Extreme model claims 100MB/s read speed and 60MB/s write. At the time of writing, the 32GB Extreme card sells for $11. I’d say a bigger and faster Extreme Pro would be a better value if you’re looking at inexpensive UHS-I cards.

- SanDisk Ultra 32GB 30MB/s
- Write: 16.48MB/s
- Read: 45.18MB/s
- Place of Manufacture: China
- If your camera is not UHS-II capable, I would go with SanDisk’s Extreme Pro UHS-I line. The current 32GB Ultra model claims 120MB/s read speed and 10MB/s write. At the time of writing, the 32GB Ultra card sells for $10. I’d say a bigger and faster Extreme Pro would be a better value if you’re looking at inexpensive UHS-I cards.

- SanDisk 512MB
- Write: 5.87MB/s
- Read: 8.60MB/s
- Place of Manufacture: China
- That’s 512 megabytes, not gigabytes. This is possibly the oldest SD card in my possession. SD cards have come a long way in terms of capacity and speed!